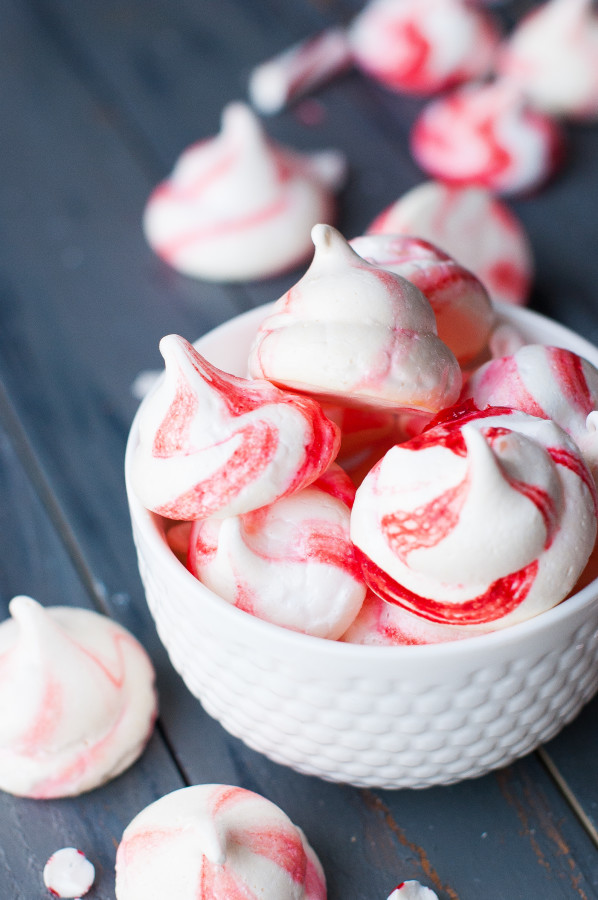
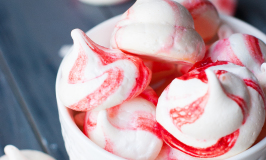
These little meringue kisses are so versatile. They make cute, delicate cookies by themselves as well as a stunning, whimsical garnish for things like cakes and puddings, etc. I originally made these because I wanted to top several chocolate peppermint cakes with them. My dad needed me to cater a Christmas dinner for the Utah Festival Opera, and found these little meringues, along with the inspiration for the peppermint cakes in this months issue of Southern Living.
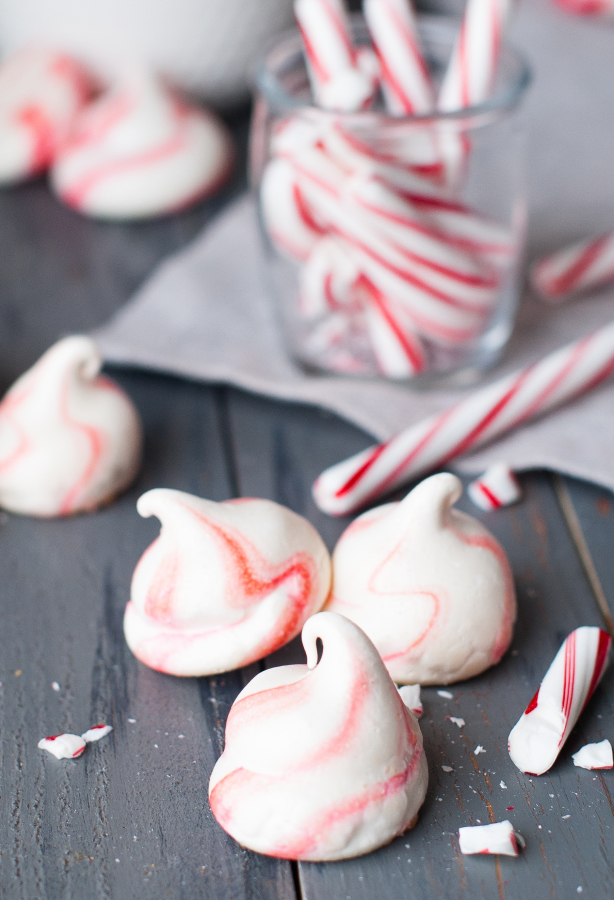
The meringues themselves are quite easy to make, but they do take a long time to bake, so they are best made a day ahead of when you nay need them. I served them on top of cake, but funnily enough I had several people come back into the kitchen asking for more of these little meringues because they loved them so much!
The outsides of the kisses are crisp and light, while the inside is slightly chewy.
They are made simply by whipping egg whites(they will whip the easiest if they are at room temperature) with a little sugar and peppermint extract.
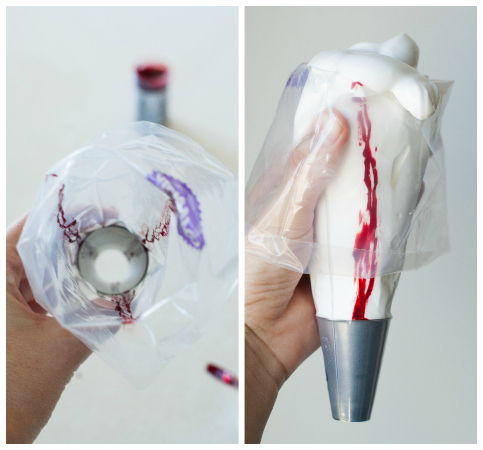
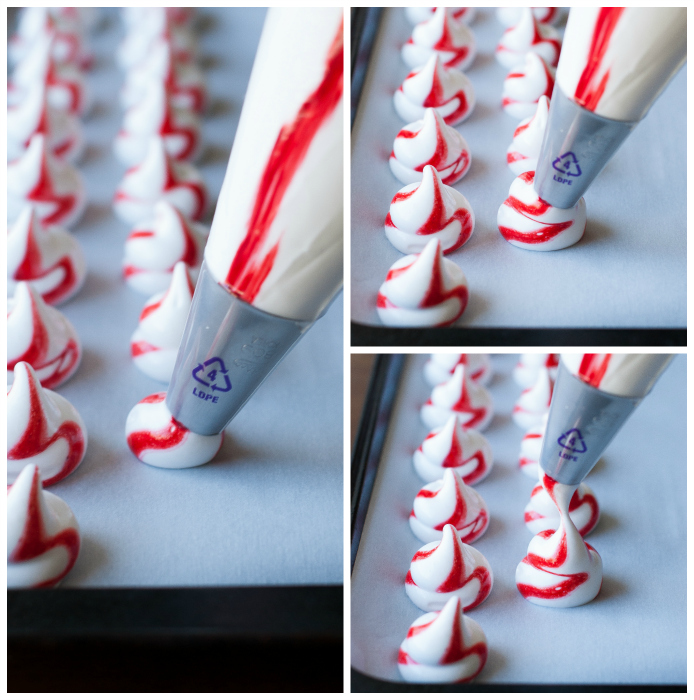
The piping bag is painted with a little food color(use gel for best results) and then filled with the whipped egg whites.
They are then piped out into little kisses and baked for several hours. Not TOO technical, but see the photos below for clarity on painting the coloring and piping the meringues.
And stay tuned for a very magical, seasonal cake featuring these lovelies 😉
- 6 Large Egg Whites, room temperature
- 1½ t. White Vinegar
- 1½ C. Sugar
- 1 t. Peppermint Extract
- Red food coloring gel
- Preheat the oven to 200 degrees.
- Line 2 baking sheets with parchment paper.
- Place the egg whites in the bowl of a stand mixer fitted with a whisk attachment and beat on high speed until stiff peaks form. Reduce the speed to medium and add the vinegar. Beat in the sugar, ½ C. at a time until blended. Beat an additional 2 minutes. Add mint extract and beat just until incorporated.
- fit a pastry bag with a large round tip and, using a small food-safe paint brush, brush 3 stripes of red gel food color up the sides of the inside of the pastry bag, starting at the base of the tip(see pictures).
- Fill the painted pastry bag ⅔ full of the whipped egg whites. Pipe small kisses about an inch apart on the prepared cookie sheets(see pictures). Repeat with remaining meringue, using a new bag with fresh food color when the first runs out.
- Bake meringue in the preheated oven for 2 hours. Turn off the heat and let the meringues cool inside the oven for 3 hours, or until completely cool.
Recipe via Southern Living


I could easily eat a few dozen meringues in one sitting. Especially if there’s peppermint involved. No wonder people asked for more! I love the way you made the red swirl in the meringues – very impressive!
Me too! Thanks Sarah!
You could certainly see your expertise within the article you write.
The arena hopes for more passionate writers like
you who are not afraid to mention how they believe. Always go after
your heart.
How far in advance can you make these and ho
Hi Stacy! You can make these a few days in advance but store them in open air or they will become sticky =)
Oops how do you store then
How would you go about making them lemon flavor? The peppermint were fabulous! But I have a friend who is allergic to mint and I want to do lemon for her!