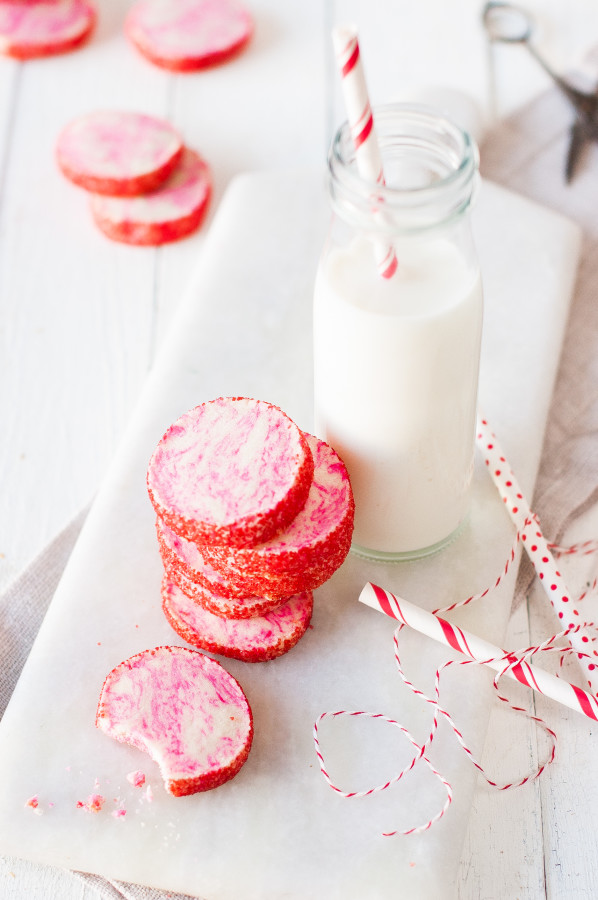
Since we’re doing the Christmas cookie thing, I felt an icebox cookie recipe was essential. There’s something about slicing cookies, rather than rolling each individual one that is so load-lifting. Not that cookie making is a burden. I would never say that about such sweet things. But it does simplify things and we all need that this time of year.
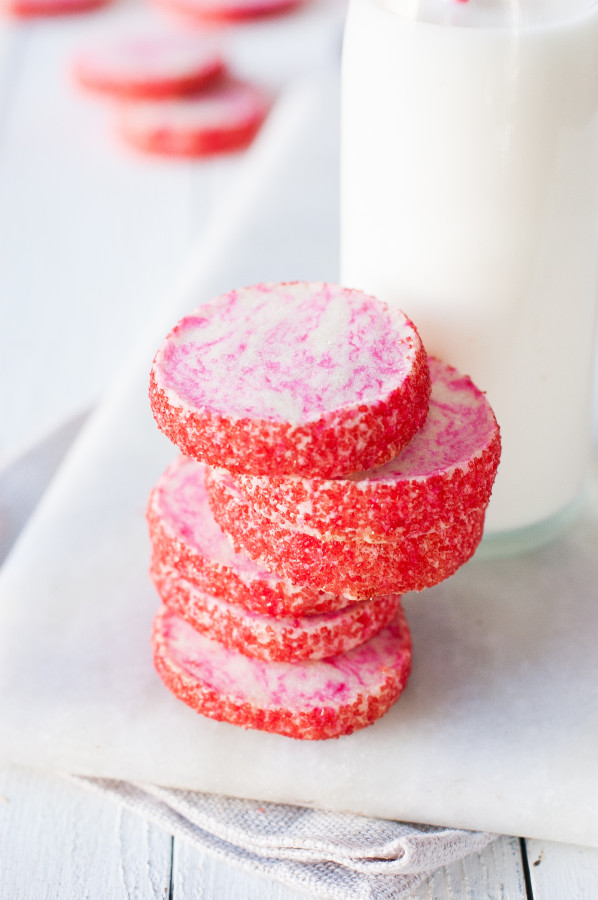
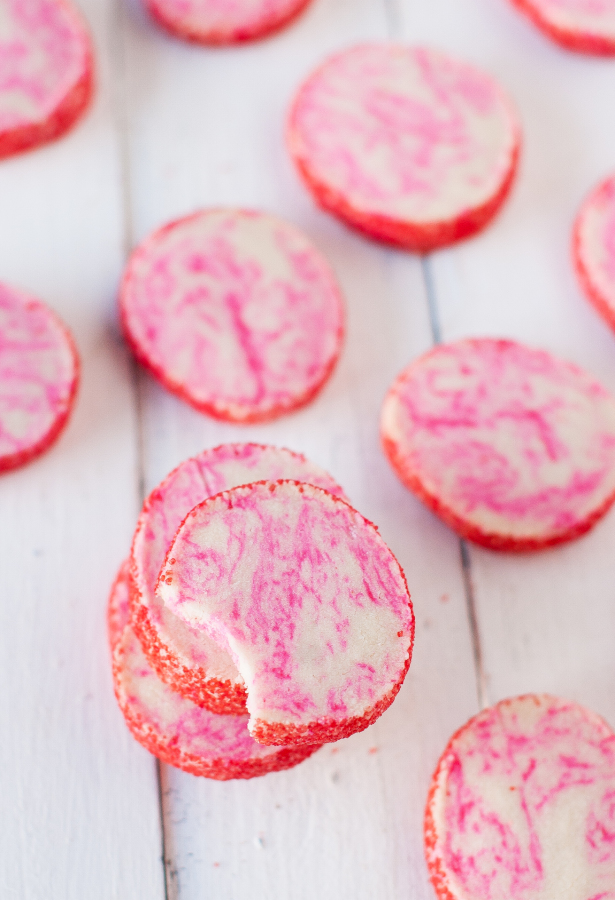
These icebox cookies are flavored with peppermint oil and are light, soft, and melt in your mouth delicious. The red food color used to give the cookies a colorful swirl is optional, but I thought it made them so festive and fun. So does the red sugar crystals the cookies are rolled in before chilling and slicing. These would look so nice all wrapped up in a little cellophane bag and tied with ribbon.
This recipe is also great to keep in your fridge for a few days, unbaked, so that you can slice of a few and bake them whenever the urge hits. Or guests stop by which is pretty much bound to happen this time of year 😉

- 14 T. Butter, softened
- ½ C. Powdered Sugar
- 1½ C. All-purpose Flour
- ½ C. Cornstarch
- ½ t. Vanilla
- 4 Drops Peppermint Oil(use a grade suitable for consumption)
- Red Food Color
- Red Sugar Crystal Sprinkles
- Place the butter and powdered sugar in the bowl of a stand mixer fitted with a paddle attachment. Beat on medium speed until light and fluffy, about 2 minutes.
- Add the vanilla and peppermint oil and mix in.
- Mix the flour and cornstarch together in a separate bowl and add to the butter mixture. Mix together on low speed until just combined.
- Set aside half of the cookie dough.
- Add 2-3 drops red food color to the remaining dough and mix together until slightly distributed through the dough. Add the uncolored dough back to red dough and lightly toss together.
- Press the dough together to form one big ball and roll into a log about 2" thick.
- Roll the log of dough in red sugar sprinkle until fully coated.
- Wrap the log of dough in plastic wrap and refrigerate for at least one hour.
- Preheat the oven to 300 degrees. Line a baking sheet with parchment paper or a non-stick mat.
- Remove the dough log from the fridge and slice into rounds about ¼-1/3" thick.
- Place on cookie sheet about 1½" apart and back in preheated oven for 12-15 minutes.
- Bake for less time if you want a softer cookie, more time if you want a crisp, shortbread like texture.
- Remove from oven and move to a wire rack to cool. Store in an airtight container.


Totally adorable, and so festive!
Thank you Allie! =)
I ADORE these!!! So pretty!! Can’t you just picture these wrapped in see through plastic wrap and tied with pretty ribbon at both ends?!
December 6, 2016
Hello Kayley,
It seems I am your newest fan. This is one of those recipes you see that you cannot WAIT to make. Never mind that I am a long-time peppermint fanatic. This is a perfect example of why my pantry is always stocked with baking essentials, so I have any and every required ingredient already on hand (YES, I even have the peppermint oil!) for those times when I spot a recipe just begging me to make it…right NOW.
My Q: Is this a cookie dough that would work well in a cookie press? It seems so, but I humbly defer to your expertise.
Thanks so much for sharing this delightful recipe which is festively perfect for giving to friends and loved ones during the Christmas season–and inevitably eating scads of them myself.
You could definitely try it! It’s a firm dough, so it should work =)