How was your Thanksgiving? I got away with going to two dinners, so things went pretty swell over here.
Soup season is upon us and there is one skill that you really should have in your arsenal.
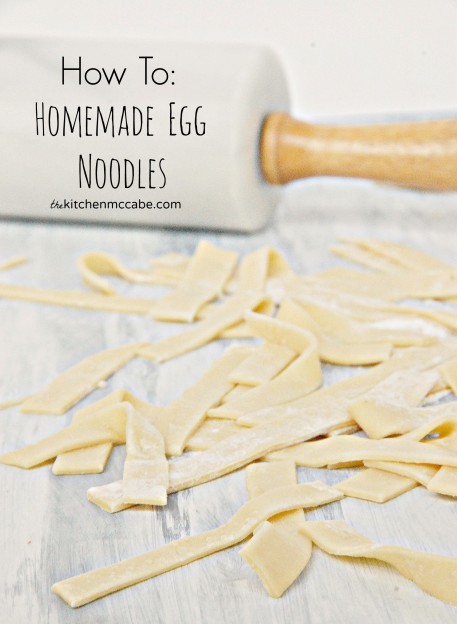
Making homemade egg noodles.
There is nothing more comforting on a cold night than a bowl of steaming hot chicken noodle soup, full of tender veggies, chicken, and those thick, rustic egg noodles. There is something so old fashioned and wholesome about it.
They are super simple to make and really take so little time, along with costing next to nothing to make. One batch of these noodles costs about .50 to make, compared $2-3 for the frozen egg noodles you but in the store.
HOW TO MAKE HOMEMADE EGG NOODLES
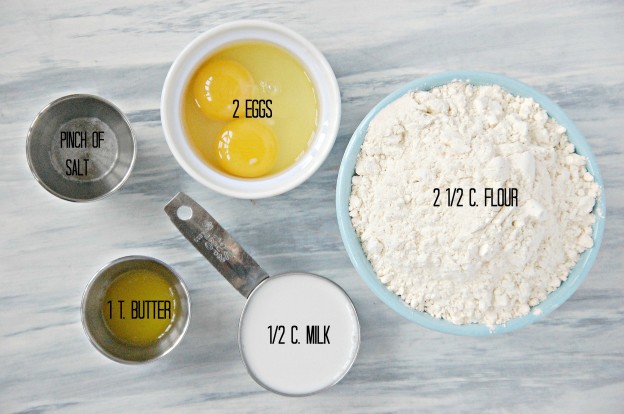
Assemble all of your ingredients so that you don’t have to grab anything while mixing. Your hands will be messy!
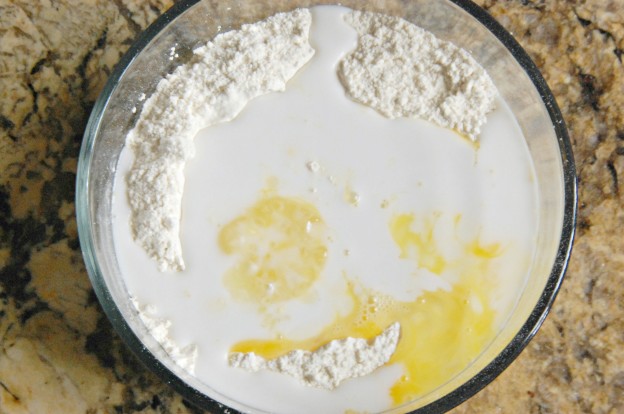
Place the flour and salt in a mixing bowl and form a well in the center. Pour the butter, milk, and eggs into the center of the well. Using your fingers, mix the ingredients until they come together.
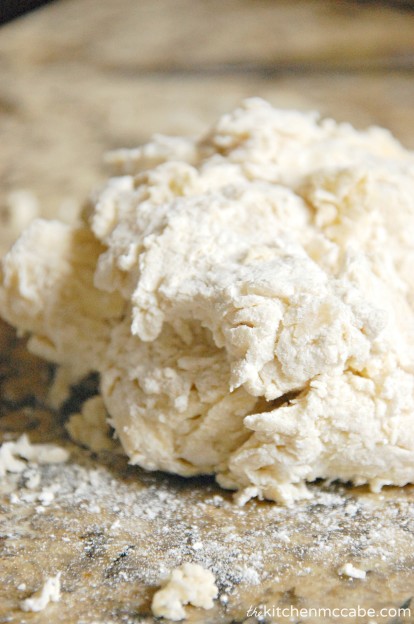
Turn the dough out onto a floured surface and knead for 5 minutes.

After about 5 minutes the dough should be relatively smooth.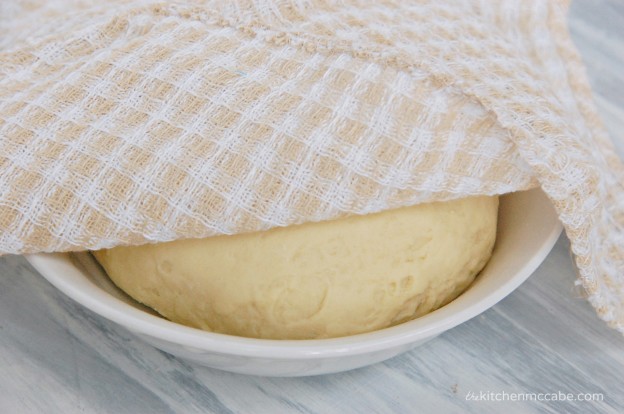
Place the dough in a small bowl and cover with a cloth. Allow to rest for 10 minutes.
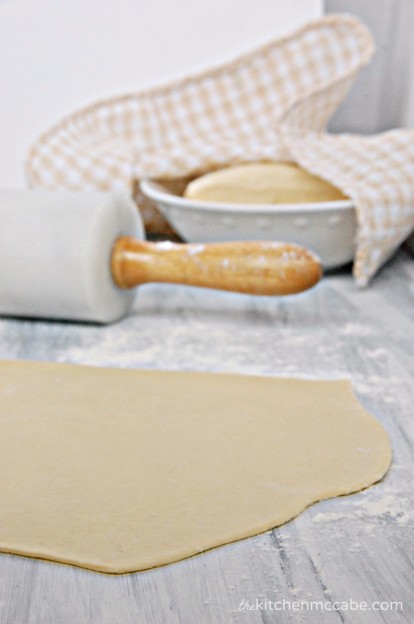
Place the dough on a floured surface and roll out into a rectangular shape with a thinness of about 1/4″. *The dough will expand when it’s cooked, so if it is not rolled thin enough you will have very thick noodles.
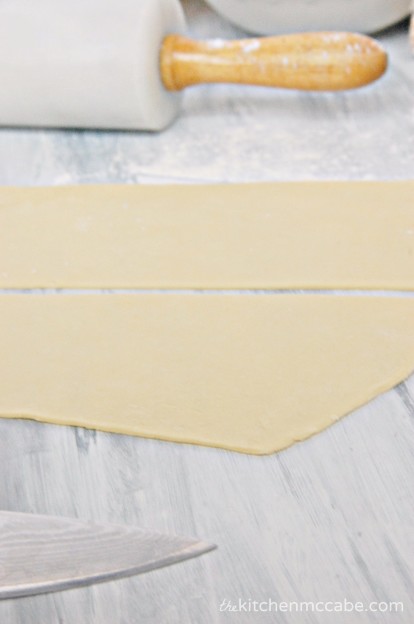
Cut the dough in half, lengthwise.

Using a pizza cutter, slice the dough into strips width wise, making each strip 1/4″-1/2″ wide.
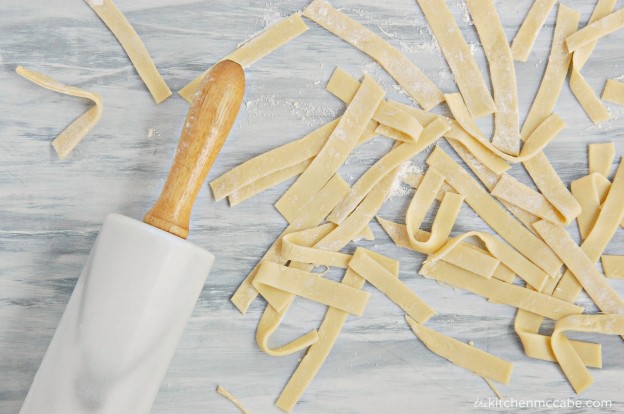
Sprinkle a little flour over the tops of the noodles and then gently toss them with your hands, lightly coating the noodles with flour.
The noodles can be allowed to air dry(make sure they are not touching each other because they will stick together) and then added to your soup(give them about 5 minutes to cook).
I like to use them fresh and throw them right into my soup after slicing. They will cook faster fresh, in only a minute or two.
- 2½ C. Flour
- 1 pinch salt
- 2 Eggs, beaten
- 1 T. Butter, melted
- ½ C. Milk
- Assemble all of your ingredients so that you don’t have to grab anything while mixing. Your hands will be messy!
- Place the flour and salt in a mixing bowl and form a well in the center. Pour the butter, milk, and eggs into the center of the well. Using your fingers, mix the ingredients until they come together.
- Turn the dough out onto a floured surface and knead for 5 minutes.
- After about 5 minutes the dough should be relatively smooth.
- Place the dough in a small bowl and cover with a cloth. Allow to rest for 10 minutes.
- Place the dough on a floured surface and roll out into a rectangular shape with a thinness of about ¼″. *The dough will expand when it’s cooked, so if it is not rolled thin enough you will have very thick noodles.
- Cut the dough in half, lengthwise.
- Using a pizza cutter, slice the dough into strips width wise, making each strip ¼″-1/2″ wide.
- Sprinkle a little flour over the tops of the noodles and then gently toss them with your hands, lightly coating the noodles with flour.
- The noodles can be allowed to air dry(make sure they are not touching each other because they will stick together) and then added to your soup(give them about 5 minutes to cook).
- I like to use them fresh and throw them right into my soup after slicing. They will cook faster fresh, in only a minute or two.
- *The noodles are best when they are not cooked for a long amount of time, as they will continue to soak up liquid and soften. Add them to your soup only in the last few minutes of cooking.
*The noodles are best when they are not cooked for a long amount of time, as they will continue to soak up liquid and soften. Add them to your soup only in the last few minutes of cooking.


I’ve made these once and they were delicious! I’m curious if you’ve ever tried freezing them. I’d like to make a double batch and freeze half of the dough.
Thanks Eden! I haven’t tried freezing them, but I would imagine that if you kept them dusted with enough flour to keep them from sticking they would freeze just fine. Let me know how if works if you try it!
I made egg noodles and used only half the dough. I froze the other half, still in a ball, wrapped it in plastic wrap and then put it in a freezer bag. I just pulled out that dough today and made the rest of the noodles and put them in chicken noodle soup. They were great!! I’m not sure you could freeze the noodles but you can freeze the dough. 🙂
Glad to hear it freezes well! Thanks Becky!
My grandma made homemade egg noodles all the time and froze the extra for later. They are just a delicious frozen! Though, like stated, you should dust them with flour first (gma always did) to prevent sticking.
nae nae sauce
When you say “1 T butter”, what does the T stand for?msuper excited to make these, want to get it right!
T stands for tablespoon. Hope you like them =)
HOW long did it take to thaw
All purpose flour?
Do you use all purpose or self rising flour and do you sift flour?
All purpose, no sifting necessary. 🙂
How long do u get dry b4 u can freeze
What is your recipe for the soup that you use with these noodles if you don’t mind me asking? ?
I made these and they were delicious!
How long does it take to dry?
I make mine with whole wheat flour…and use extra melted butter. I roll mine out on a floured t towell (with lots of flour). I Use a rolling pin…coated with flour.
Works out great
Delucious.