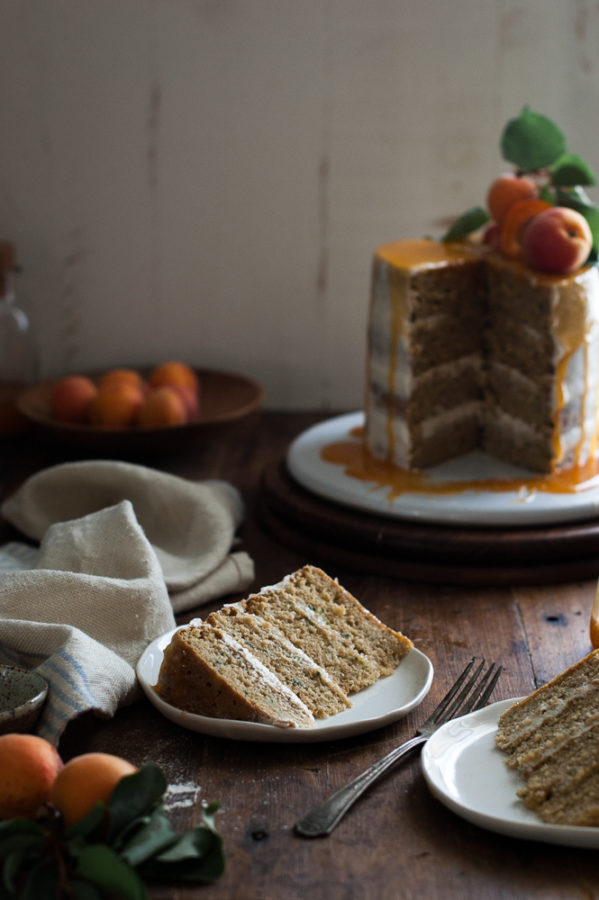
*This Zucchini Browned Butter Oat Cake with Apricot Caramel is gluten free and combines mid-late summer produce in a sweet, salty seasonal dessert.

My computer and I are not getting along at all today…so scroll to the bottom of the page for the recipe. Sorry folks. You get ALL the pictures today. All due to technical difficulties, of course. Technology = NOT my strong suit.
Aaaaanywho.
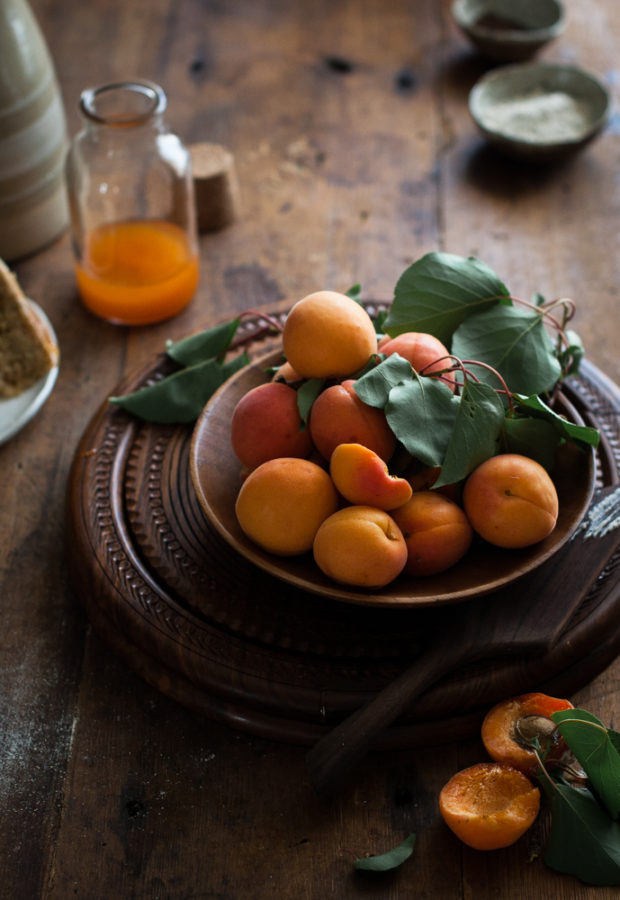
I wasn’t about to let apricot season pass by without throwing them into some sort of baked good. This cake came to be from a little day dreaming I did involving stone fruit – topped cakes. Browned butter and zucchini seemed like a match made in heaven and tangy apricots are the perfect foil to their savory salty-ness.
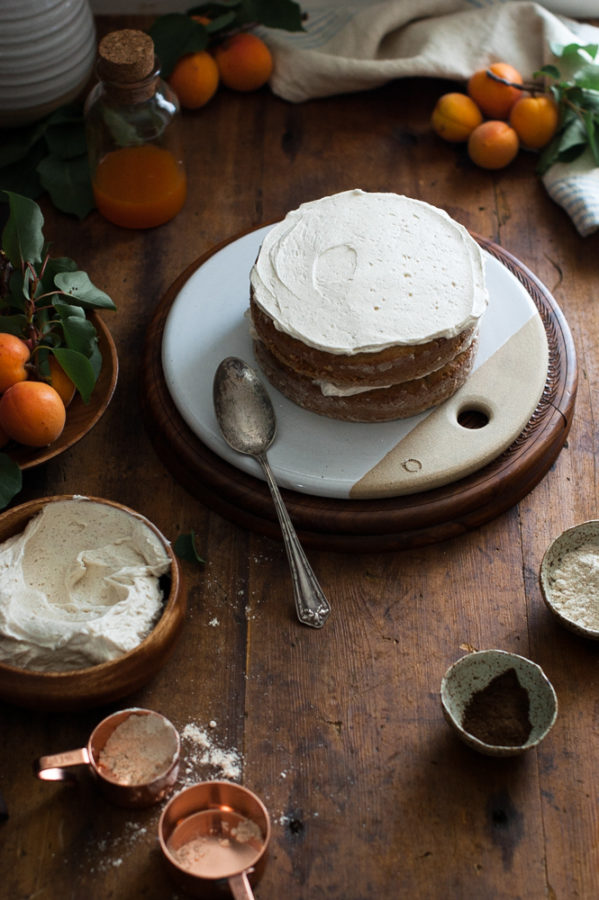
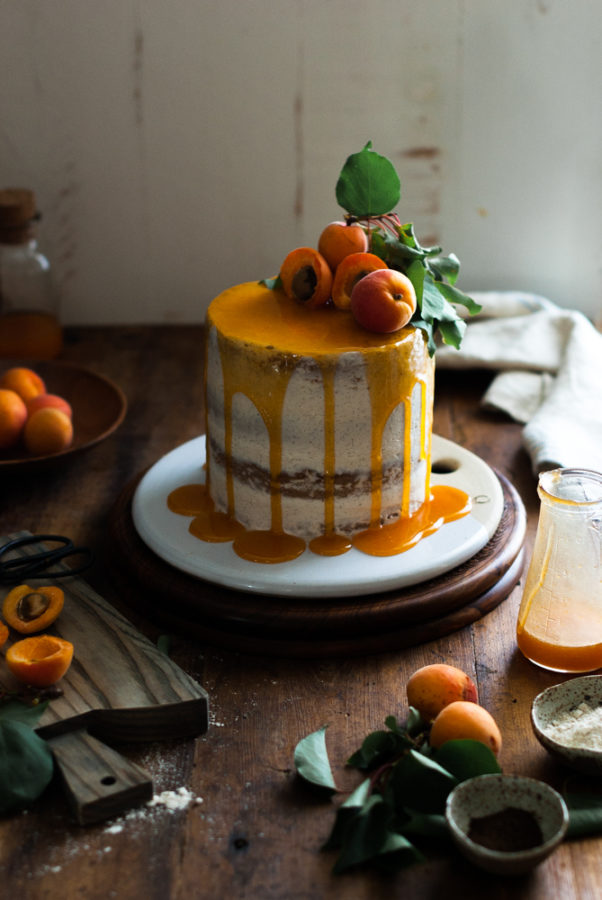
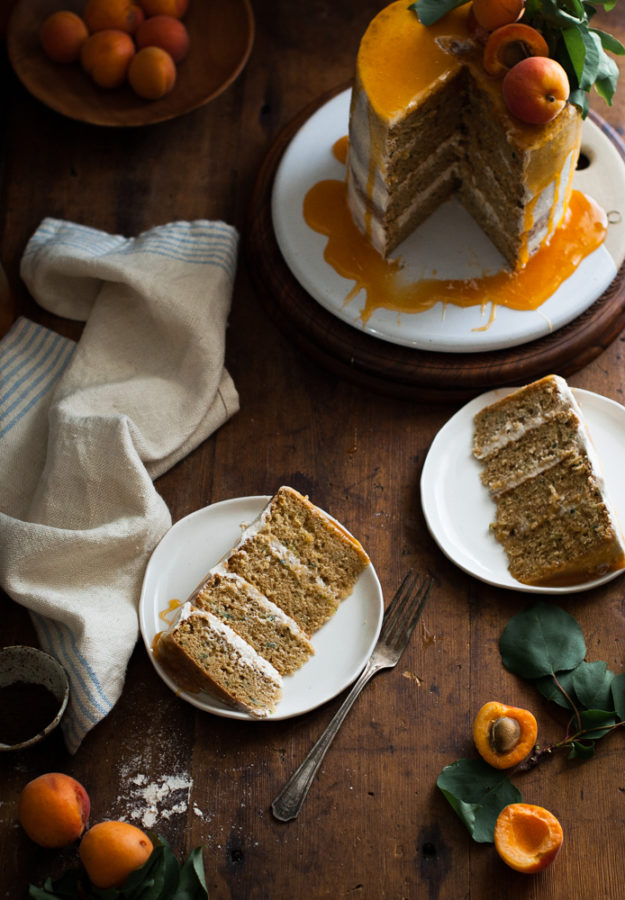
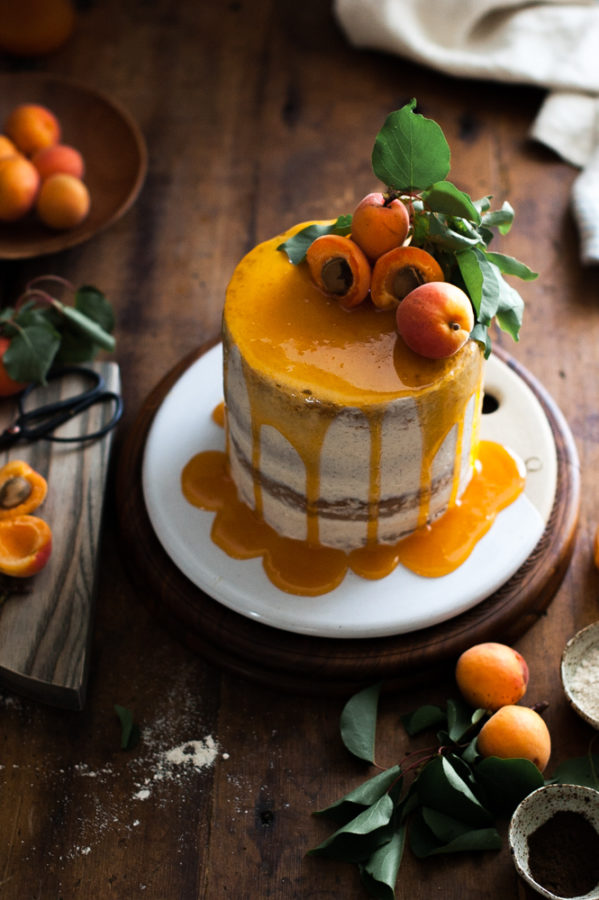
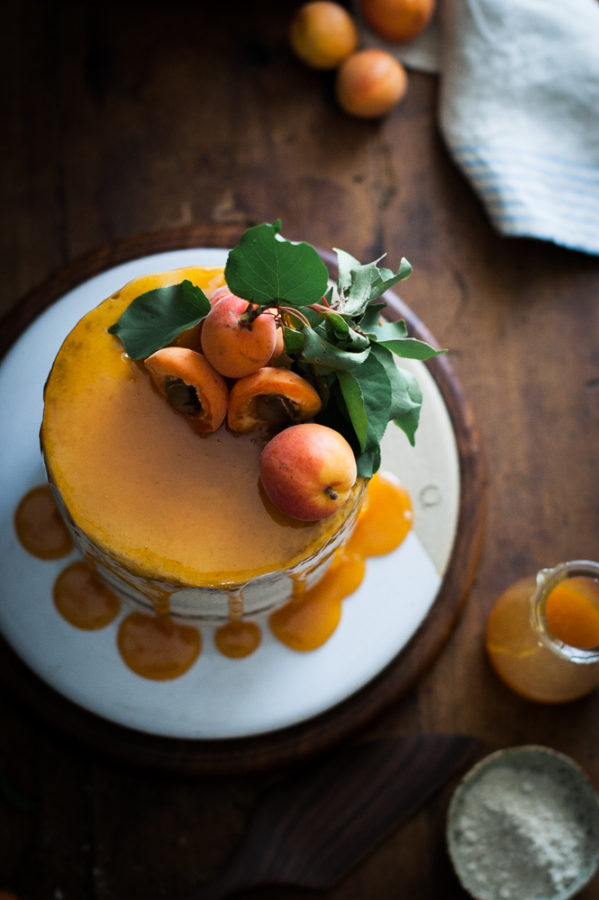
Super soft and moist cake layers combine salty browned butter with little ribbons of zucchini and earthy oat flour layered in between pillowy whipped cream frosting sweetened with honey. The top of the cake is drenched in a caramel sauce that is made with apricot nectar and butter, instead of the usual cream.
You can make your own nectar (I even just recently posted a recipe and tutorial on how to make it!) or you can buy it canned at the grocery store or in single serving size cans (Kerns makes an apricot nectar, I believe).


- Zucchini Browned Butter Oat Cake:
- 1 cup (2 sticks) Salted Butter
- 2¼ cups Oat Flour
- ½ cup Tapioca Starch
- ½ teaspoon Baking Soda
- 1 teaspoon Baking Powder
- 1 teaspoon Cinnamon
- ¼ teaspoon Himalayan Pink Salt
- ¾ cup Raw Cane Sugar
- ¾ cup Coconut Palm Sugar (or brown sugar)
- 4 large Eggs, room temperature
- 3½ cups Zucchini, shredded
- Whipped Cream Frosting:
- 3 cups Heavy Whipping Cream
- 2 tablespoons Honey
- Apricot Caramel:
- 1 cup Raw Cane Sugar
- ¼ cup Water
- 2 tablespoons Butter
- ⅔ cup Apricot Nectar
- Zucchini Browned Butter Oat Cake:
- Preheat oven to 350 degrees. Grease four, 6" round cake pans with oil and line the bottoms of each pan with parchment paper. Dust the sides with flour. Set aside.
- Place the butter in a saucepan and heat on medium high until butter begins to melt. Continue cooking until the butter begins to foam - watch closely. Once the butter begins to foam the milk solids will begin to brown and the butter will take on a nutty smell. Once the butter is a nice medium brown color, remove from heat. Take care to not overcook or butter will burn.
- Pour the hot browned butter into a heat-proof mixing bowl and set aside.
- Place the flour, tapioca starch, baking soda, baking powder, cinnamon, and salt in a mixing bowl and whisk together.
- Add the raw cane sugar and coconut palm sugar to the bowl of browned butter and whisk until smooth. Add the eggs, one at a time, whisking each one in until smooth and creamy. Add the zucchini and whisk until distributed.
- Add the dry ingredients to the wet and stir together with a large spoon, stirring just until combined.
- Divide the cake batter between pans. drop each pan once or twice on the counter to remove air bubbles.
- Bake the cakes in the preheated oven for 25-30 minutes, or until a toothpick inserted in the center comes out clean. Let cakes cool for 10 minutes in their pans, then remove from pans. Let cool completely on a wire rack. When cakes are cool, level off the tops.
- Whipped Cream Frosting:
- Place the heavy cream in a large mixing bowl and beat with an electric mixer until very stiff peaks form. Add the honey and beat in until just distributed.
- Use the cream to frost the cake with, filling each layer with about ½ cup of cream, and rustic-ly frosting the top and outside of cake. Place cake in the fridge while you make the apricot caramel.
- Apricot Caramel:
- Place the sugar and water in a saucepan., stirring to dissolve the sugar. Place over high heat with a lid over the top of the pan. Let the mixture come to a boil while covered, let boil for 2-3 minutes. Remove the lid and let the mixture continue to boil until it starts to turn a medium golden brown. As soon as it has turned a medium caramel color, add the apricot nectar and butter. The mixture will sputter and the caramel may seize up - just keep letting it boil and it will melt down again. Once the mixture has turned into a smooth, bubbling mass, remove from heat. Let cool completely.
- Once cool, pour the caramel over the top of the refrigerated cake. Top with apricots, if desired.
- Serve chilled.


Wow that is spectacular.. I love the pools of the sauce
Thank you so much, Sarah! xo
What a delicious cake! I think this was an excellent use of the apricots! And, I hope your technology issues are fixed!
Thank you so much, Amanda! Alas – I doubt technology and I will ever get along. Haha.
I love apricots and this cake is so beautiful and looks very delicious! Beautiful photography as always dear Kayley! 🙂
Thank you so much, Lili! You are so sweet! xo
Can this be made with regular flour?
Yes, definitely! If you use regular flour, sub it for both the oat flour amount AND the tapioca flour amount 🙂
WOW! This is one of the most amazing cakes I have ever seen. Apricots are my favourite. I can hardly wait to make it and try hard to make it look as amazing as yours. 😀
This is one of the most beautiful summer cakes I have ever seen. Beautifully styled <3
I can only imagine how delicious it must be.
Aw, thank you Aysegul! You are the sweetest! xo
Should the zucchini be drained?
Nope!