I think that Citrus fruits are one of the best things about winter. When you think about it (and I suppose this really only applies to those of us in the northern hemisphere), having citrus in such abundance during these freezing, barren, snowy months must be Mother Nature doing us one heck of a solid. It’s like she knew we’d need a little cheering up and little orbs of juicy, sweetly tangy fruit wrapped up in a scented colorful skin would be just the thing. Thanks Mother N. You da best.
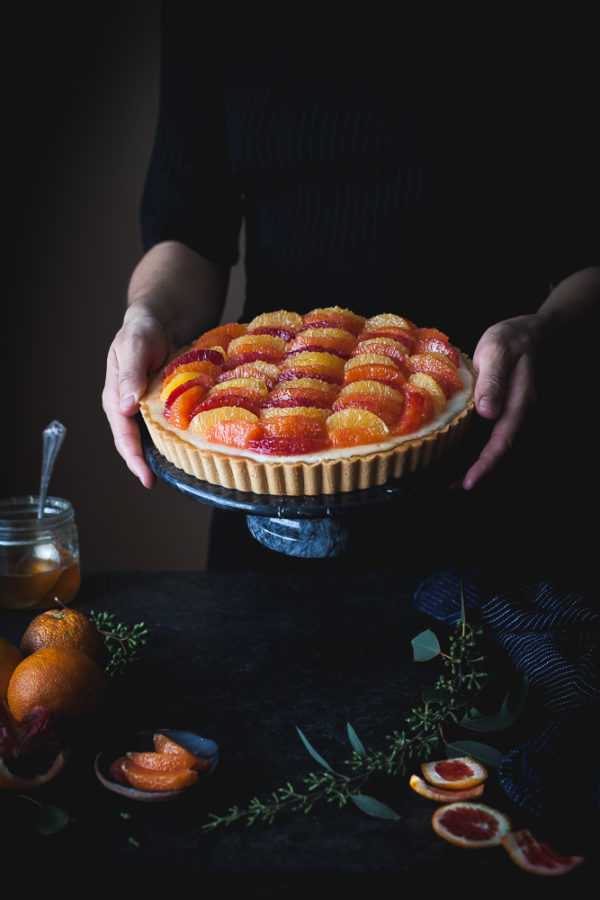
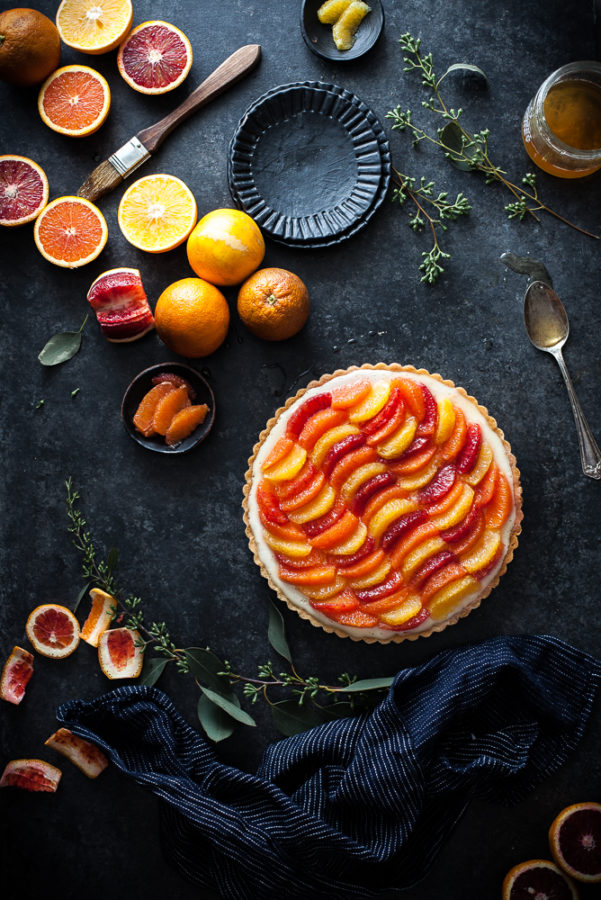
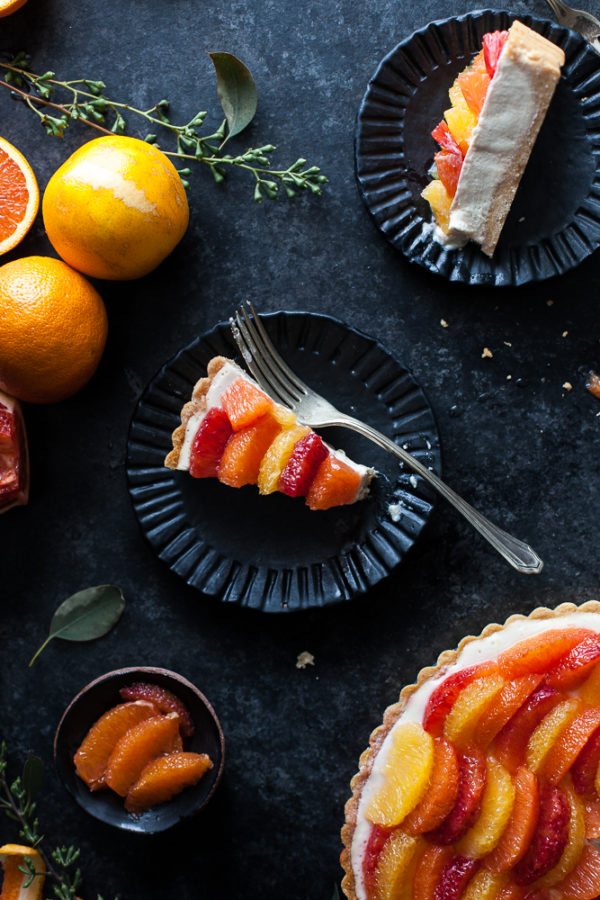
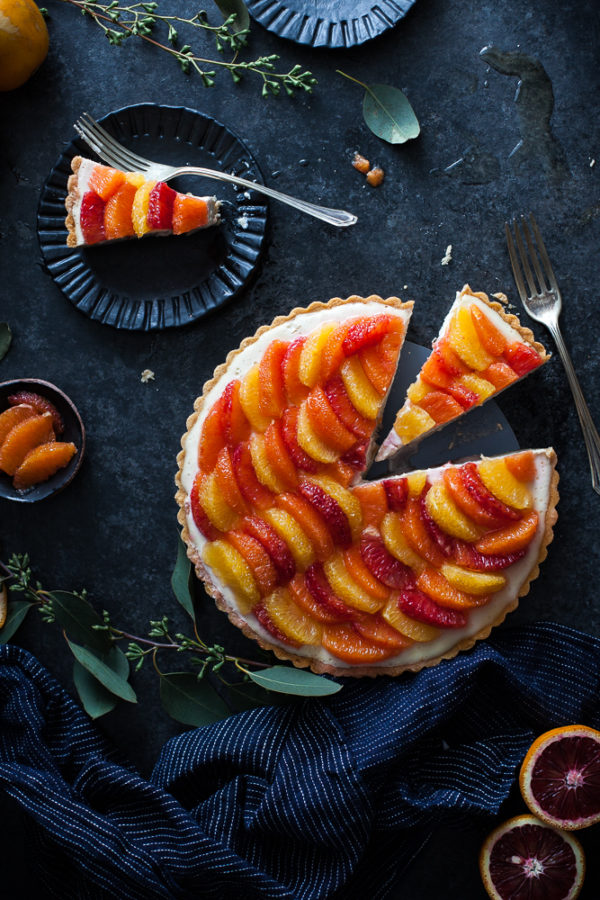
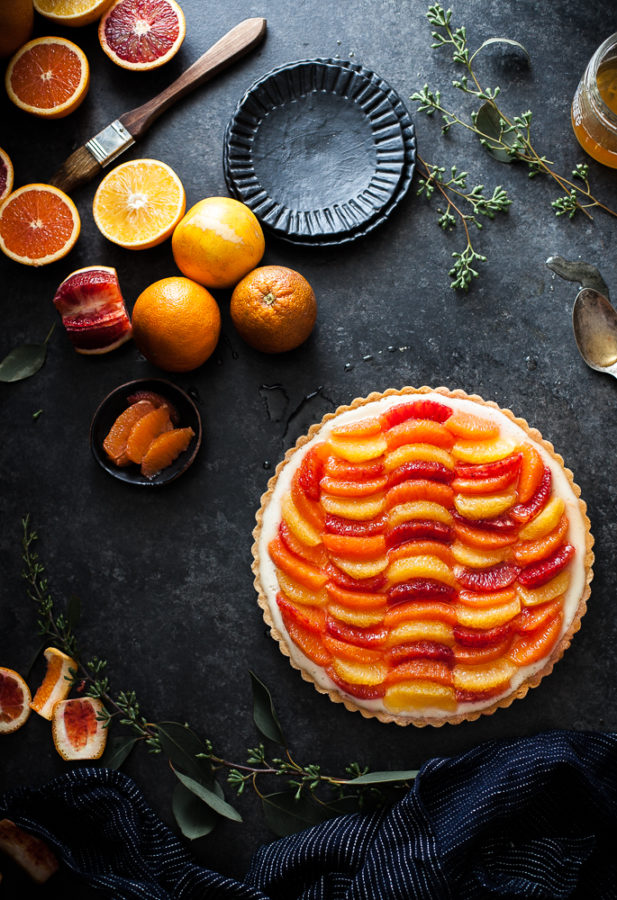
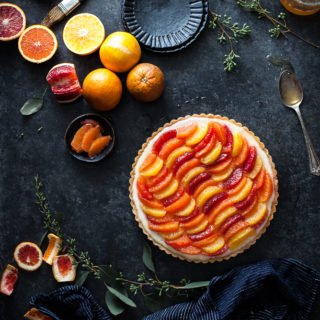
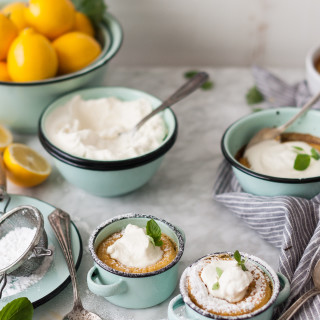
This tart is just the thing to showcase those pretty citrus fruits. A crisp, shortbread-like coconut crust is filled with a creamy lemon and vanilla flavored filling with the texture of a dense cheesecake which is the perfect canvas for rows of segmented oranges glazed with honey (or agave, if you’re vegan). I used traditional oranges, Cara Cara, and Blood oranges to give my tart it’s multi-color effect.
Be sure to dry your orange segments off on a towel before arranging on top of the tart – this will keep the juices from running excessively and the tart will hold up longer.
Gluten and grain free, refined sugar free, dairy free, egg free, vegan, and paleo, this tart is for just about anyone! Brighten up your winter with one soon!

- FOR THE CRUST:
- 1⅓ cup Coconut Flour
- ½ teaspoon Sea Salt
- ⅓ cup Maple Syrup
- ⅔ cup Coconut Oil (in a solid state)
- FOR THE FILLING:
- 1 cup Cashews, soaked overnight
- 1 Can Full Fat Coconut Milk, water separated from the cream
- ¼ cup Water
- ¼ cup Meyer Lemon Juice
- ¼ teaspoon Sea Salt
- ⅓ cup Coconut Oil, liquefied
- ⅓ cup Coconut Butter, liquefied
- 2 tablespoons Cacao Butter, liquefied
- ¼ cup + 1 tablespoon Honey or Agave Syrup (if vegan)
- Seeds scraped from 1 Vanilla Bean
- Zest of 2 Meyer Lemons
- TO GARNISH:
- 9-10 Oranges in varying shades, segmented (I used blood oranges, Cara Cara,, and standard oranges)
- Honey or Agave Syrup (for Vegan), as needed
- FOR THE CRUST:
- Preheat the oven to 350 degrees.
- Place the coconut flour and salt in a mixing bowl and whisk together. Add the maple syrup and stir in until the mixture becomes crumbly. Add the coconut oil to the mixture and work into the flour with a spoon or rubber spatula until the a dough forms and there are no pieces of coconut oil remaining.
- Press the dough into a 9" tart pan with a removable bottom. This may take some time - be patient and use the tips of your fingers to press the dough across the pan and up the sides.
- Bake the tart shell in the preheated oven for 10-12 minutes, or until the crust is lightly golden brown across the bottom.
- Remove tart and let cool completely.
- FOR THE FILLING:
- Drain the cashews and place them in a high speed blender. Add the coconut water (set cream aside), water, meyer lemon juice, salt, coconut oil, coconut butter, cacao butter, and the honey. Blend, slowly working your way up to high speed, until the mixture is creamy and completely smooth.
- Remove the lid and add the vanilla bean seeds, lemon zest, and coconut cream to the mixture. Replace lid and blend again at medium speed just until the coconut cream has been fully mixed in. Pour the mixture into the cool tart shell. Place in the refrigerator to set overnight. For a faster method, place in the freezer for 1 hour, or until fully set.
- TO GARNISH:
- Do not garnish the tart until an hour or two before serving - letting it sit with the orange slices for longer than 5-6 hours will cause the juices to run and the tart to become soggy.
- Arrange the segmented oranges across the tart as pictured, or in whatever pattern you prefer.
- Brush the tops of the orange slices with honey or agave until the tart is fully coated and glossy.
- Remove tart from form and Serve!
Jeez! Your culinary skills are shining in those perfectly segmented oranges. I almost didn’t believe you when you said it was gluten free, paleo, vegan, etc, etc. But I read the ingredients. And now I really want to give it a try. Sounds so lovely!
A tart made with coconut crust and citrus topping + vanilla cream is definitely the best tart ever! 🙂 I like this combination a lot!
This is beautiful Kayley, I totally agree with you about citrus fruits – food of the gods. I’ve just made a huge batch of lemon curd that I can’t wait to use.
Lemon curd in Steel Cut Oats is really good. TJs has both.
That looks just so beautiful Kayley! I never used coconut crust but so tempted now.
This is stunning Kayley! I love how you have used all the different colored segments! and well said… it is mother natures way of bringing color in the winter months! 🙂 Great tip on drying the segments before placing them on the tart
This is beyond gorgeous, Kayley!
This is beautiful and sounds delicious…oranges always make Christmas for me, but I’m going to have to try it before then!
Oranges are for everyday. Here on the California Central Coast we have oranges and Meyer Lemons all over the neighborhood all year. Also Blood Oranges do well in this climate. My Blood Orange is only 28 inches tall so it will be a while.
If you make a Nantucket Cranberry Pie delete the sugar in the filling and use a Cara Cara Orange. I peel it carefully then section and using a serrated knife cut each section into about four pieces. It will not be liked by many who need sugar. Be sure to use lots of whipped cream.
Goooorgeous! What can I use to substitute for the cacao butter and coconut butter? doesn’t have to be vegan
Thank you!
I would suggest replacing those items with coconut oil – it will get you the closest to the same texture, though not as much flavor. You could also use melted white chocolate, which actually might be your best bet.